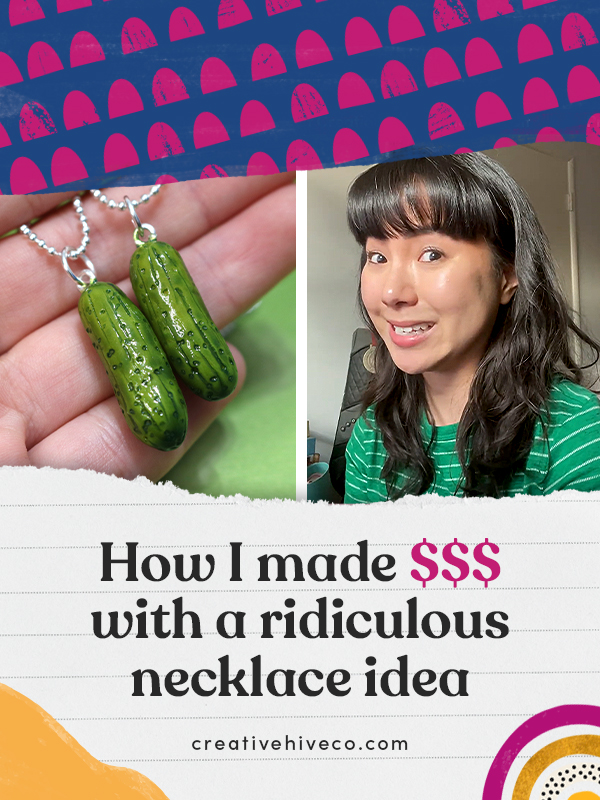
How I made $$$ with a ridiculous necklace idea
I want to help you build a sustainable, profitable handmade business that makes you consistent income and sales. I only ever teach or recommend marketing, social media, pricing, production and branding tips that I’ve personally used successfully in my own 7-figure handmade businesses.
I'm Mei, from Los Angeles!
Read More
Popular Posts You'll Love
Looking for something?
Categories
starting a business
get more traffic
running a business
make more sales
branding
growing a business
mindset & productivity
podcasts
pricing & money
product photography
reviews
selling on etsy
selling on amazon
social media
selling wholesale
- Facebook0
- Twitter0
- Pinterest0
- 0share
One week.
That’s all I had to create and launch a brand-new handmade product to catch the holiday shopping frenzy and sell it before the Christmas shipping deadline. No pressure, right?
But here’s the kicker: it usually takes me four weeks to design new jewelry.
But this time? I sped things up like never before.
Curious how I pulled it off? I’ll be sharing all the details, including the sales numbers, at the end.
Read on below to find out how I did it!
Setting The Stage
Everyone is spending money right now. It’s a great time to launch new stuff especially if you sell gifty things.
So, if I can’t do this, I’ll miss the boat and have to wait a WHOLE YEAR.
Sometimes, I can’t help but envy those who can pump out new products so fast, and think, how do they do that?
Especially if they’re artists using print-on-demand—like a few hours and it’s done!
But if you sell handmade items, you get it. It’s a whole different process.
First, there’s ordering supplies (and hoping they arrive on time). Then comes the design process—which is basically a cycle of trial and error.
Not to mention dealing with physical stuff like shipping delays or waiting for paint to dry.
So, even if I know it’s hard and I’m in a time crunch, I challenged myself to create a totally unique product, hoping it can bring in more sales for me this holiday season!

The Pickle Craze
It’s December 3rd. The countdown is on and I need this product live by December 10.
With the shipping cutoff on the 18th, that gives me just 8 days to make sales.
Eight. Days.
Here’s the thing, I’m not a traditionally trained artist. Everything I know came from a lot of trial, error, and practice.
But here’s what I do know: the first step is always research.
You need to know what people actually want to buy. What’s trending? What’s in demand?
Trust me, it’s the best way to set your product up for success.
Fortunately, since I’ve been running my store for years and have built up a little bit of an audience and community, people have been sharing tons of product suggestions with me.
And the one idea that keeps coming up? A pickle necklace.
It’s one thing if someone throws out a totally random idea, but when a bunch of people are all asking for the same thing? You got to pay attention.
And right now, it’s all about pickles.
Personally, I’m not a huge lover of pickles and I didn’t get it at first, so it’s not something I would have personally made out of my own passion.
But, I wanted to see if I could do it and make something that’s a little different from all the sweet baked treats I usually make.
The research part? Easy, and done.
If you’re just starting out and don’t have a community like mine, no worries—you can still do this research yourself.
It just won’t be as easy as having it handed to you.
In my course, A Sale A Day Business System, there’s a whole module and an awesome checklist on how to do it.
I also have a free workshop where I dive deeper into my business philosophy and more about the course, if you’re curious.
But for now, let’s talk about how I actually made the pickle!
Process of Making a Pickle Necklace
I started by mixing up the base clay for my pickle.
I always mix in small batches because it’s hard to predict how the colors will bake. They often turn out differently than what you see before they go into the oven, so it usually takes a few tries to get it right.
If I’m lucky, I’ll hit the sweet spot in the first or second try.
I began with some yellow and green to start. I’ve been at this for nearly two decades, so I had a pretty good shot at getting it right.
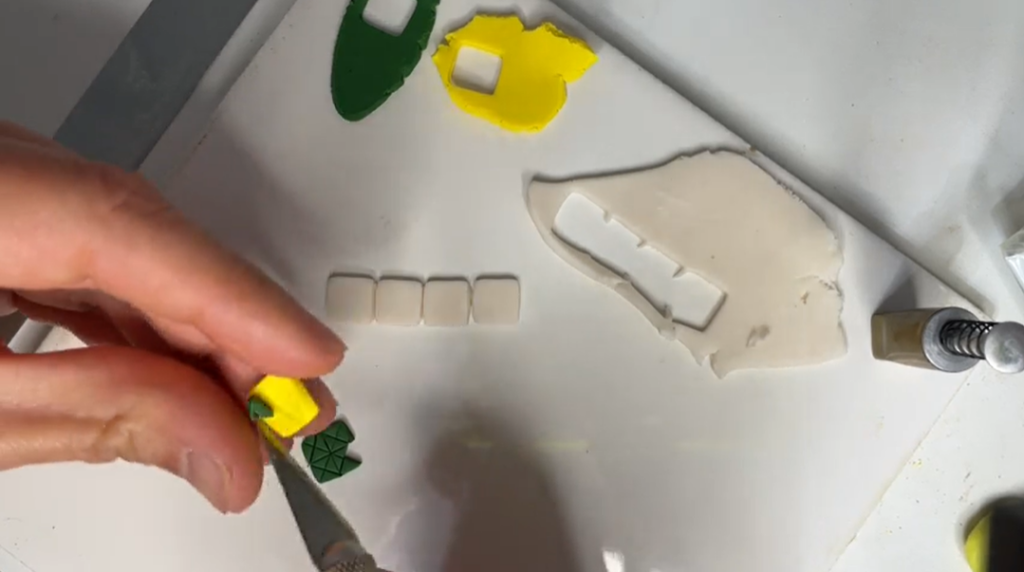
I’ve got a solid sense of what colors work for different food items, but it’s always a bit tricky—especially when making miniature food.
I usually use translucent clay for that added depth, but the downside is that it totally messes with how the color looks after baking. It always trips me up!
It was already looking pretty cucumber-like, but I knew it would probably end up a little less vibrant and more muted since I added the translucent clay.
So, I baked it and waited to see how it turned out.
When the clay came out of the oven, it had changed color a bit, but in the best way possible—it looked super cucumber-y!
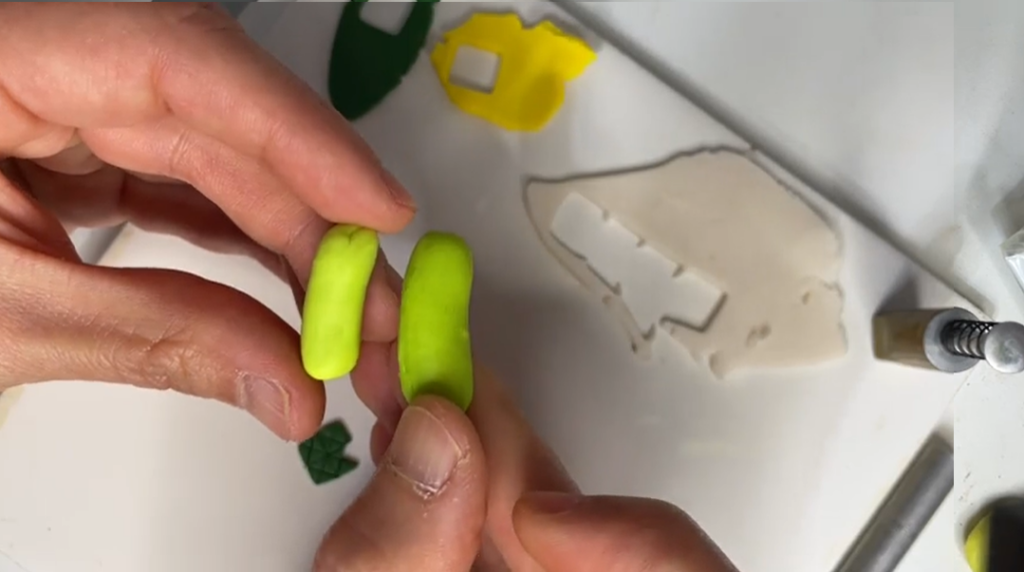
A bit of green paint on top would definitely take it to the next level, but honestly, I was thrilled with how the green turned out—it was vibrant, fresh, and spot-on.
I was up against the clock, so I decided to go for it. I mixed up a larger batch so I could produce a few dozen pieces and get them ready for the sale.
But then, I hit a dead end with the paint.
I’d been trying different colors and layers over the baked cucumber clay, but nothing worked. The green was too bright, and when I toned it down with amber, it looked too “pickle-y.”
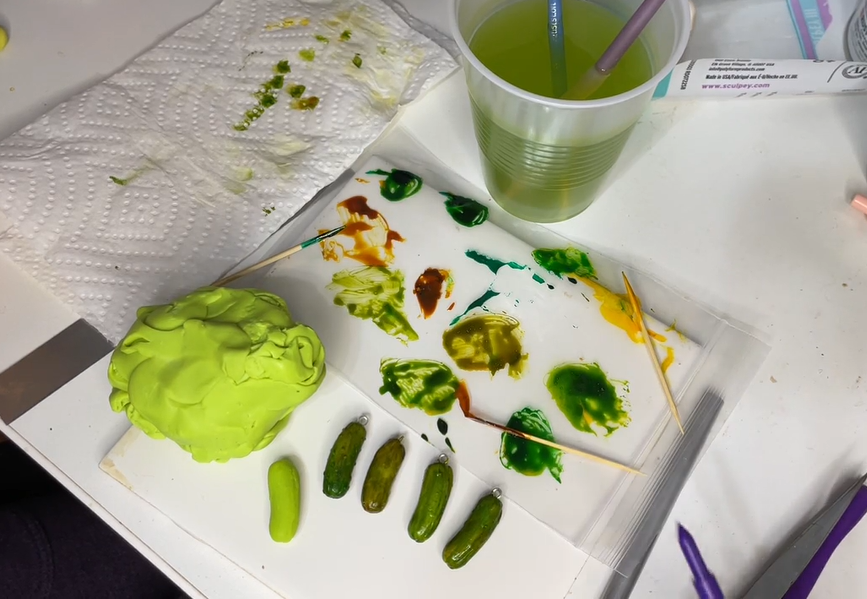
It wasn’t fresh or cute enough for jewelry, and I was overcomplicating things.
The idea of doing all those layers for 50 or 100 pieces? Absolutely not. I knew I needed to find a better, easier solution.
So, I had to go back to the drawing board.
The clay color was all wrong—too bright, too cucumber-y. To fix it, I’d need to adjust the base clay to a more pickle-like shade, with less green and a touch of yellow.
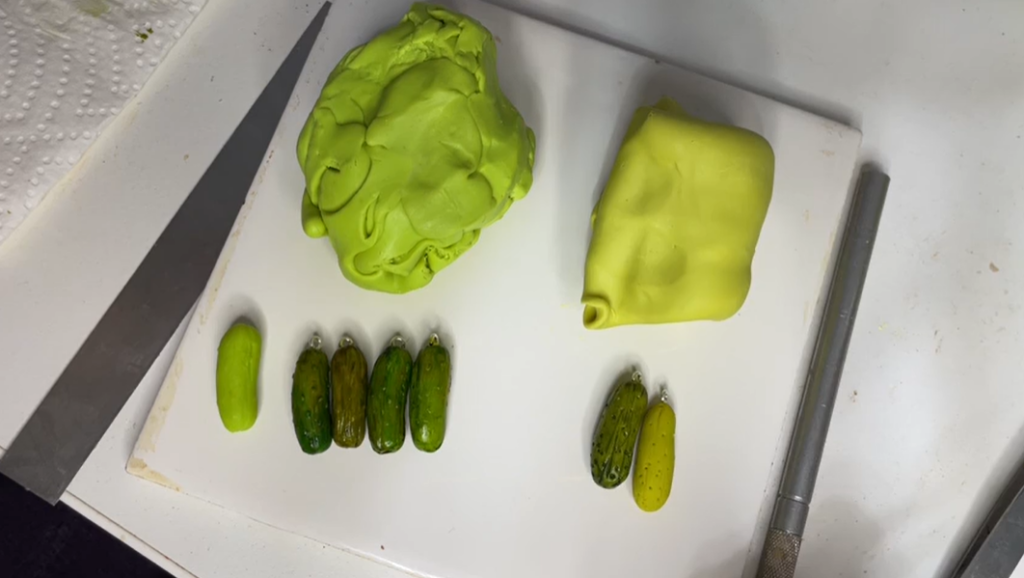
And let’s not even talk about the paint!
Mixing multiple paint shades for the right color wasn’t realistic for quality control, especially since I’d eventually need to train my small production team to replicate this.
The solution was clear: I needed a pre-made pickle-colored paint and a clay base that didn’t need so much tweaking.
I made a big batch of that green thinking it was perfect, but now it’s all going in the scrap pile. That Sunk Cost Fallacy hit hard.
But I knew taking the time to get it right right NOW would make everything more scalable, profitable, and manageable in the long run.
Sometimes, you just have to slow down to set yourself up for success.
Switching to the new clay color was totally the right call. I loved how it turned out and it’s definitely looking more like a pickle!
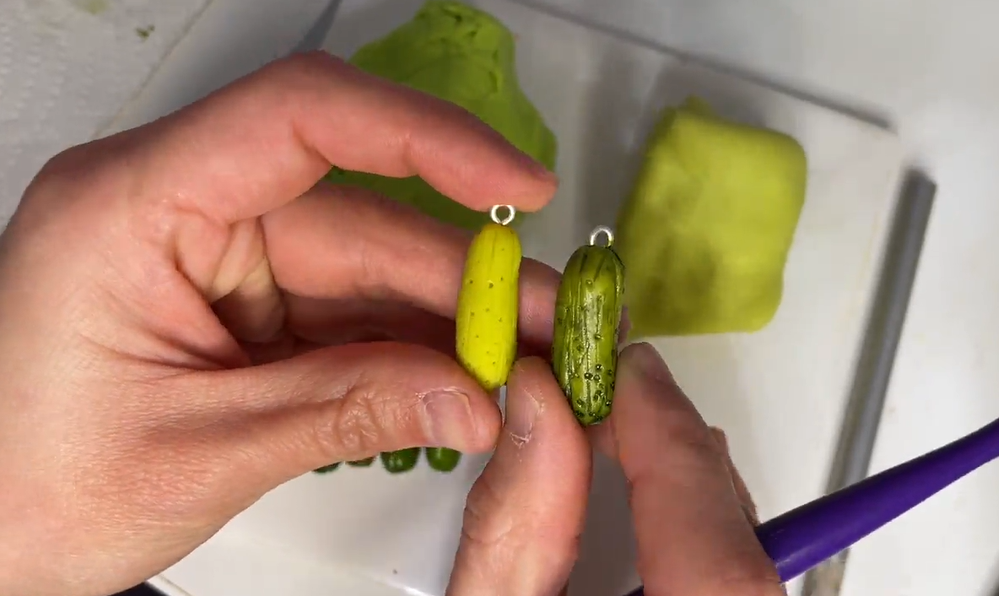
I also found the perfect paint combo, and I’m really excited about the color. It’s exactly what I had in mind.
Mixing colors is probably the toughest part of designing a new product for me, so it’s no surprise I spent a little extra time getting it right.
Normally, I’d make a few test pieces to practice and perfect the design before photographing it for my online listings.
But you don’t need a whole stockpile of items sitting around—just a good photo and a solid product listing.
But I want to tell you an important detail in my pickle design process.
Forget the color and size for a second—let’s talk about texture.
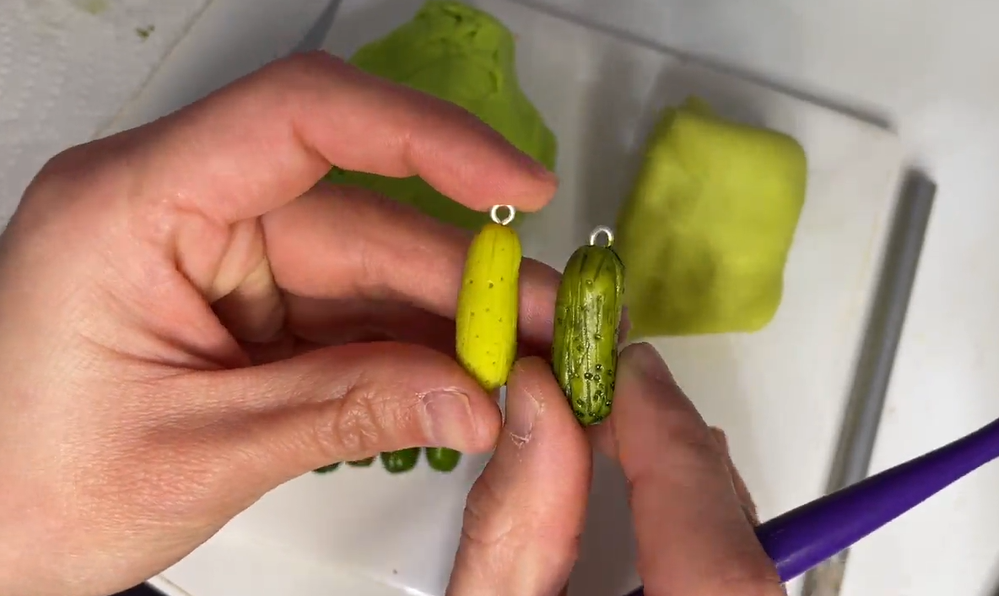
The first version has little bumps, which I made by rolling tiny clay balls and pressing them on. It’s more accurate to how a real pickle looks.
For the second version, I went with a quicker approach—just poking holes in the pickle. And, surprisingly, when I showed them to my husband, he liked the hole-y version better!
It turns out, even though the bumpy version was more realistic, the hole-y one looked better.
And the best part? Making pickles with holes saves me so much time. The bumpy version took forever to make, but the pickle with holes is a huge time-saver!
Scaling Production
I had been working on painting the pickles, and I was getting pretty consistent with the look.
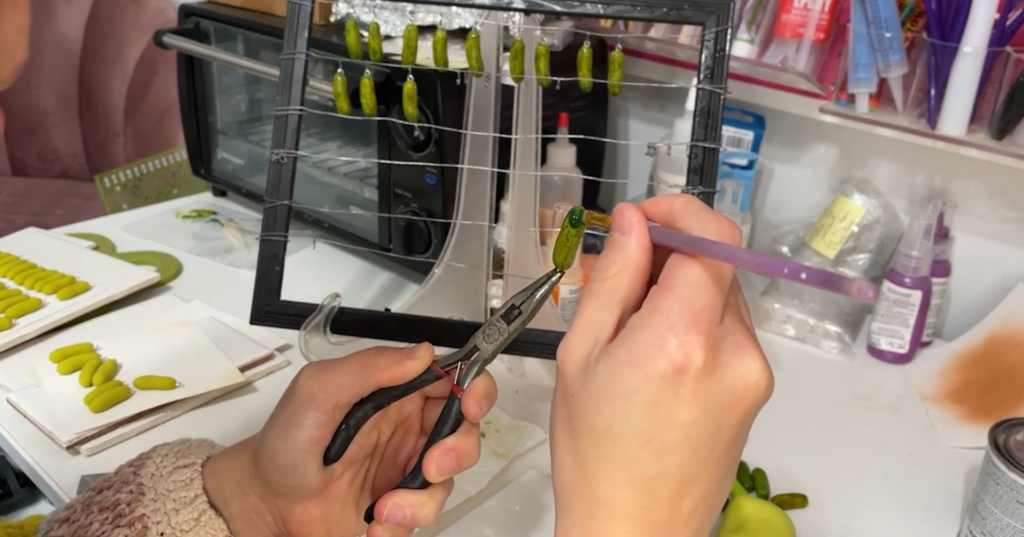
Since I’m an overachiever and like to leverage my time as efficiently as possible, I thought it would be a great idea to record myself making the pickle jewelry so I could create training videos for my production assistant team.
It only took five minutes to set up everything—my top-down camera, Blue Yeti mic, and lighting.
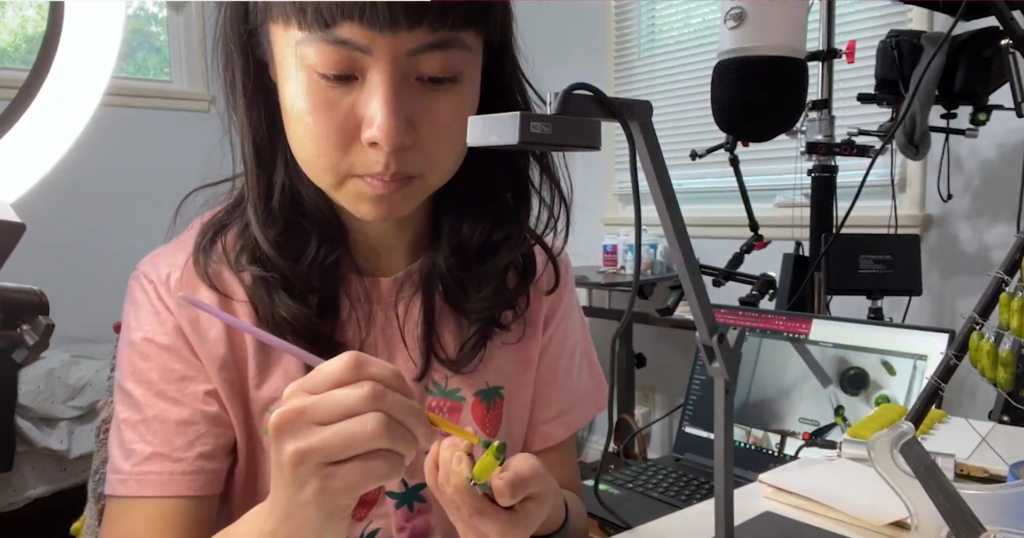
I was able to talk through the steps while I worked, which would make it way easier when I needed to scale production.
The Price
I’ve been going back and forth on the price for this pickle necklace, but I think I’ve finally landed on charging a bit more.
I realized I need to take my own advice.
I’m always telling other artists not to undervalue and underprice their work, but I was definitely guilty of that when I first priced this.
I did some digging, and there aren’t a ton of pickle necklaces out there. The ones that exist are cute, but I feel like mine has something unique to it that makes it stand out.
And it’s been super popular with my audience, so it’s clearly in demand. Simple economics—low supply, high demand, you raise the price.
I also give discounts all the time, so even with a 20% off code, it’s still going to land at around $20.
So, $35 feels like the sweet spot for me.
Normally, I’d use my pricing calculator, but I’ve got a pretty solid sense of how long my products take to make.
Editing Product Photos
The first thing I did was crop the product to make it pop and take up more space in the frame. I made sure to highlight all the little details so customers could get a good look at the pickle jewelry.

Next, I whitened the background to help the product stand out. Sometimes, when I did that, I lost some details on the necklace chain, so I always made sure to bring those back.
Once that was done, I saved the photo and moved on to the next one.
For the next shot, I used a colored background. I just brightened it up a bit, and it was good to go.
I prefer editing in Photoshop because I’m more comfortable with it, but I know a lot of people prefer Lightroom. It really comes down to what feels right for you.
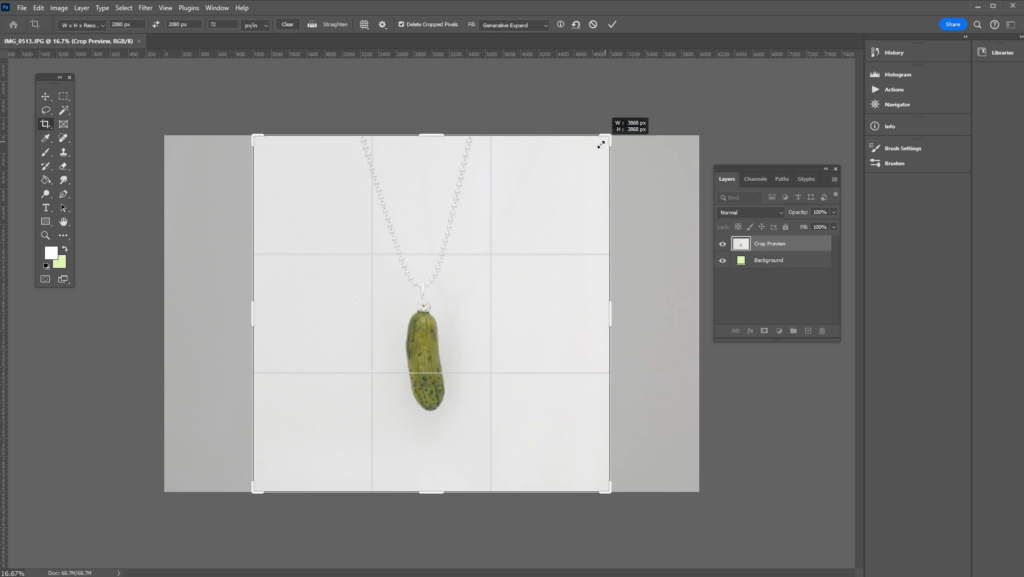
Then, I cleaned up the shadows in the shot, making sure they weren’t too distracting, and I got rid of any lint that snuck in.
To give it a more natural feel, I used AI to expand the photo and added a bit of hair.
Finally, I included a shot with multiple charms so customers could see their options.
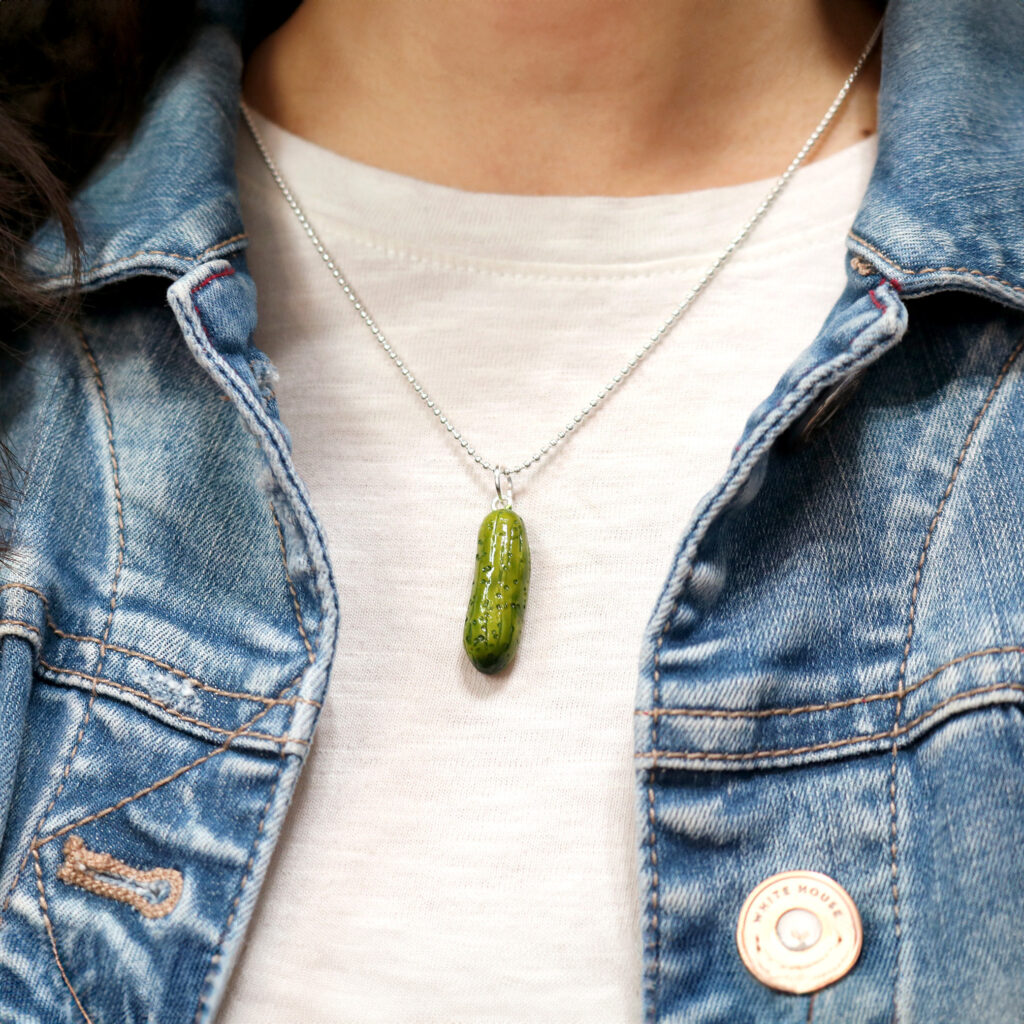
And that’s a wrap on getting my product photos ready for the listing!
Creating Product Listing
Here’s how I got my pickle necklace listing ready to go on Shopify:
First, I jumped into Shopify and uploaded the product photos.
Next up was the product description. Writing those isn’t exactly my strong suit, so I turned to Claude AI—it’s my go-to for crafting fun, engaging descriptions.
Just to compare, I also gave the prompt to Gemini, Google’s AI.
Claude’s version? So good. It was creative, fun, and just made you want to keep reading. It only needed a few tweaks to be perfect.
Gemini’s, on the other hand—It wasn’t terrible, but it was pretty basic.
I copied the description from Claude and added a little humor. I updated it to say something like, “Cucumber is 1” tall and smells like fresh, sweet cucumber—no dill pickle scent here”.
Then, I grabbed my go-to product description template from another listing, pasted everything in, and made sure it all matched perfectly.
Once that was done, I set a unique SKU for the product and updated the stock to 45 pieces (saving a few for samples).
I saved the listing as a draft and gave it a quick preview. When launch day comes, all I’ll have to do is switch it to “Active,” and it’ll be ready to go.

Teaser Email Campaign
Let me tell you how we got ready to drop the pickle necklace.
First, Jenni, my marketing assistant, got the teaser email all set up in Klaviyo. This one was scheduled to go out on December 10 to a smaller segment—just 200 people.
This wasn’t just any group. They voted on our earlier email about whether we should go with a full pickle or a sliced pickle design.
We wanted to show some love for their engagement and make them feel like they were part of the process.
The email was designed in Canva. We sliced up the visuals and uploaded them as images into Klaviyo.
The big launch email for the rest of our list was scheduled for the next day, but this teaser gave our most engaged audiences an exclusive first look as a little thank-you.
Our First Pickle Necklace Sale
So, here’s how it all went down when the teaser email went out.
Within 21 minutes…
We made our first sale of the Pickle necklace!
And it didn’t stop there. By the time the day was over, we sold five Pickles!
What makes it even more amazing is that every single one of those customers is a repeat buyer.
How cool is that? It feels so good to know that our community is behind us, supporting the launch of this new product.
I’m sure you all know what it’s like to launch something new, right? There’s always that fear…
What if no one likes it? What if no one buys it?
But once that first sale came through, all of that worry disappeared. And honestly, after that, everything else felt like smooth sailing.
We worked hard on the big launch email that went out the next day. We sent it to a much larger audience and we were all set for launch day.
It all took just one week.
I did it! I pulled off a product launch in no time and I’m honestly pretty proud of how it turned out.
Sales Results
Two weeks ago, I launched the pickle necklace. It was a gamble.
But after 14 days, we sold 23 pickles, bringing in $806!
Not bad, right?
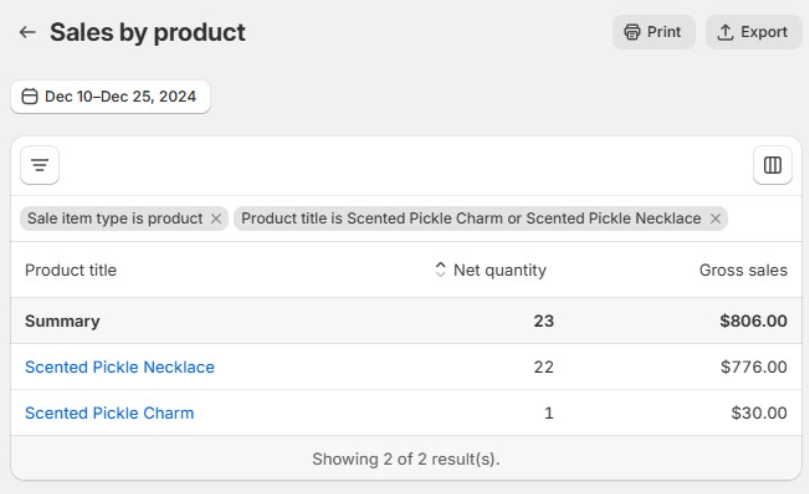
Here’s the honest truth: I was really hoping to sell more, especially since I had an engaged audience and so many people asking for a pickle necklace.
But I think these results were pretty realistic. This wasn’t one of those multiple five-figure launches you see everyone online talking about.
And honestly, that’s a good thing.
Those stories make you feel like every launch should be an overnight success, and if it’s not, you somehow failed. But that’s not how it actually works.
From what I’ve seen, and what I always tell my students, the work doesn’t stop after you launch.
You keep marketing, showing up, and getting the word out about your product. That’s where the long-term sales come in.
You keep marketing, showing up, and getting the word out about your product. That’s where the long-term sales come in.
Looking back, though, I know there’s more I could’ve done.
I could’ve built up way more anticipation before the launch, offered a special promo, or threw in a free gift for early buyers. I could’ve reached out to influencers or run ads to really push it.
But let’s be real—that’s a lot of work, and I just didn’t have the time for it. I didn’t want to pile even more pressure onto the launch.
I’ve seen enough launches to know the first day isn’t the be-all and end-all. Some of my products have made me tens of thousands of dollars over time.
I know this little pickle has more surprises ahead!
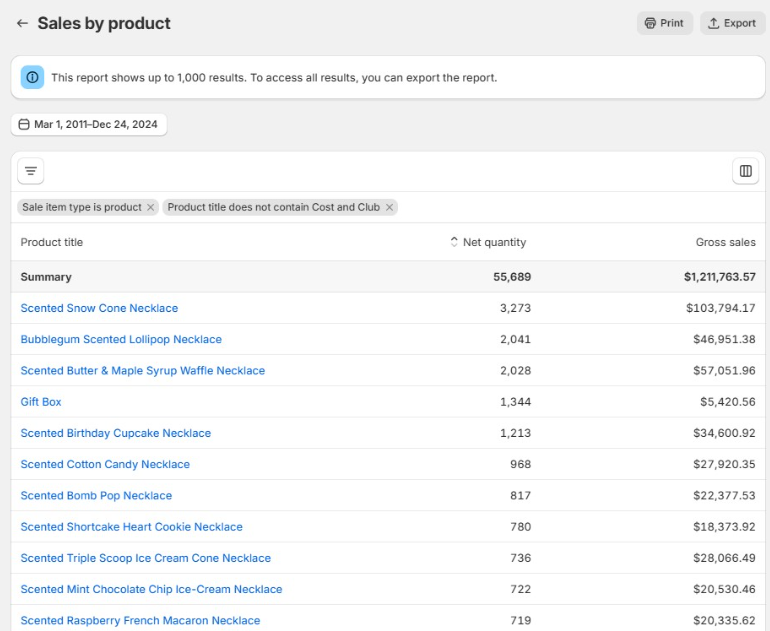
On the flip side, I know $806 in sales might seem huge to some of you just starting out.
And if you’re feeling nervous that you could never do something like that, keep in mind that I do have an existing audience and my product research was practically done for me. The risk for this launch was low.
Now, let’s keep it real, I’ve launched products that flopped. Like, zero sales.
And that’s okay! Not every idea is going to crush it. People don’t talk about that side of business enough, but trust me, it happens more than you think.
It takes time to build an audience, and nailing product research isn’t easy if you don’t know where to start. That’s exactly why I teach all this in my A Sale A Day course. It’s the stuff I wish I knew when I was just starting out.
Looking ahead, though, I’m actually super excited. Pickles are trending—thank you, Pinterest Predicts 2025! That means there’s a lot of buzz I can tap into.
My plan? Pitch to magazines, blogs, and news sites about my pickle charms. It’s new, quirky, and totally on-trend!
I’m also planning to go all-in on social media: doubling down on pickle-related content—memes, reels, you name it.
The goal is to make this little pickle the talk of the town..
Now, let’s talk about costs.
One of the best things about working with polymer clay is how affordable it is.
For this launch, I spent less than $10 on clay, another $10 on pickle-green paint, and $20 to have Jenni help me design the emails. My Klaviyo account cost me $110 for the month, and the rest went to eyepins and gloss.
In total, it’s just under $150 for almost 50 pickle charms.
Of course, that doesn’t include the hours I spent designing the necklace, taking photos, and everything else that went into the process.
Our time is not free. A lot of artists forget to factor the time they spent in creating their art when deciding on the final price for their products.
That time was an investment to your handmade business. The pickle necklace isn’t just a one-time thing. It’s a product that’ll (hopefully!) keep selling for years.
Creating new products like this is what keeps my business growing.
So, If you hit a bump in the road, just keep going. It’s about consistency, showing up, and putting in the work.
And this pickle necklace? It’s just getting started.
Leave a Comment
Liked this article? Share it!
Unlock a Profitable Handmade Business
in Just 12 Weeks Without Using Etsy
or Social Media
FREE WORKSHOP
This workshop is for anyone who makes and sells a handmade or physical product, including jewelry designers, artists, paper designers, bath & body product makers and more!
What You'll Discover
The #1 mistake people make with Etsy & social media that causes shops to FLOP
The secret to making it with your handmade shop so it's no longer just a hobby
How to make sales in your handmade shop with ease so you can finally get to 6-figures
TAKE ME THERE
Your email address will not be published. Required fields are marked *
Leave a Reply Cancel reply
About
Blog
A Sale A Day
Student Login
Free Class
Contact
Terms
Become A Student
Watch On YouTube
Student Reviews
See My Handmade Shop!
That is a really helpful bit of material. I appreciate you just giving us this useful knowledge. Please keep us advised in this way. I appreciate your contribution.
amazing idea!
google